Moving away from Google Photos can feel intimidating. Years of memories are stored there, and most people worry about losing albums, metadata, or simply getting stuck during the migration.
The good news is simple: Google lets you export everything, and Immich is designed to import large photo libraries easily. With Yundera, the process becomes even simpler because you can upload files directly to your Private Cloud Server and let Immich index them locally.
This guide explains how to move your entire Google Photos library to Immich using Google Takeout.
Step 1. Export Your Google Photos Library
First, you need to download your photos from Google.
Go to Google Takeout and select only Google Photos as the service you want to export.
Google will then prepare an archive containing all your photos and videos. If your library is large, Google splits it into multiple ZIP files. This is normal.
Once the export is ready, download all the archives to your computer.
At this point you now own your full photo library again.
Step 2. Extract the Google Takeout Archives
Unzip every archive you downloaded.
Inside the folders you will find your photos and videos organized by albums and years. Google also includes metadata files in JSON format. Immich can use these during import to restore timestamps and location information.
After extraction, you will have a folder structure containing all your media files.
Step 3. Upload the Files to Your Yundera Server
The next step is to place these files on your Private Cloud Server.
Open the Files app on your Yundera dashboard and upload your extracted folders into the Gallery directory. If your library is very large, using Samba is usually faster since it allows you to transfer files directly from your computer to the server.
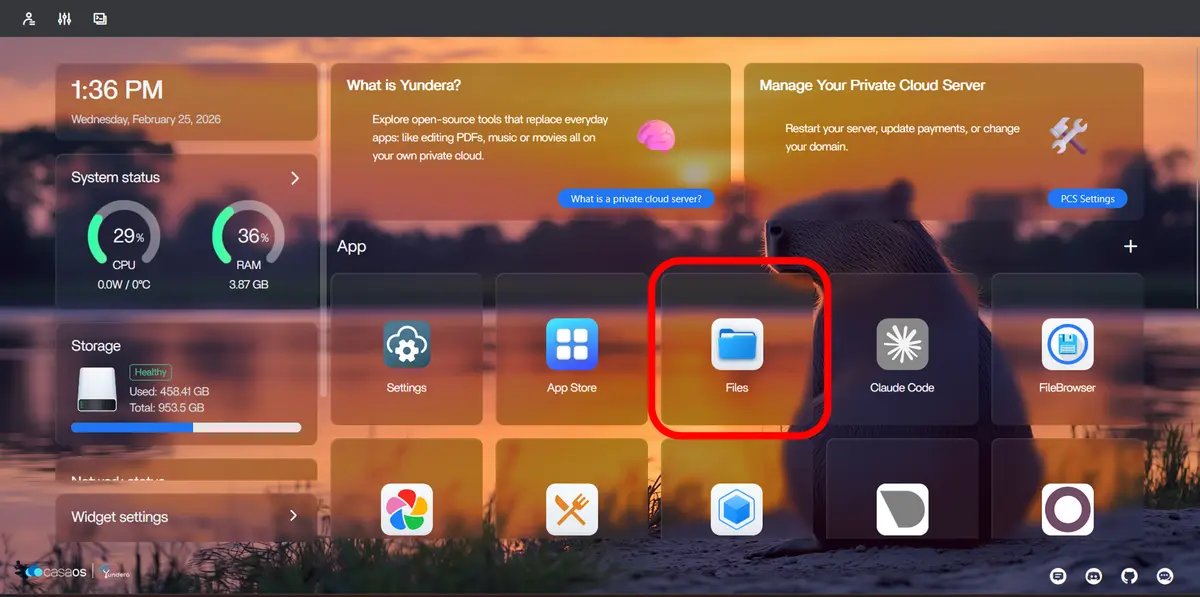
This step also avoids a known limitation in Immich where very large files uploaded through the web interface may fail.
Once the files are on your server, they are ready to be imported.
Step 4. Create an API Key in Immich
To allow the terminal to communicate with Immich, you need an API key.
Open Immich from your dashboard and go to your Account Settings. In the API Keys section, create a new key with full permissions.
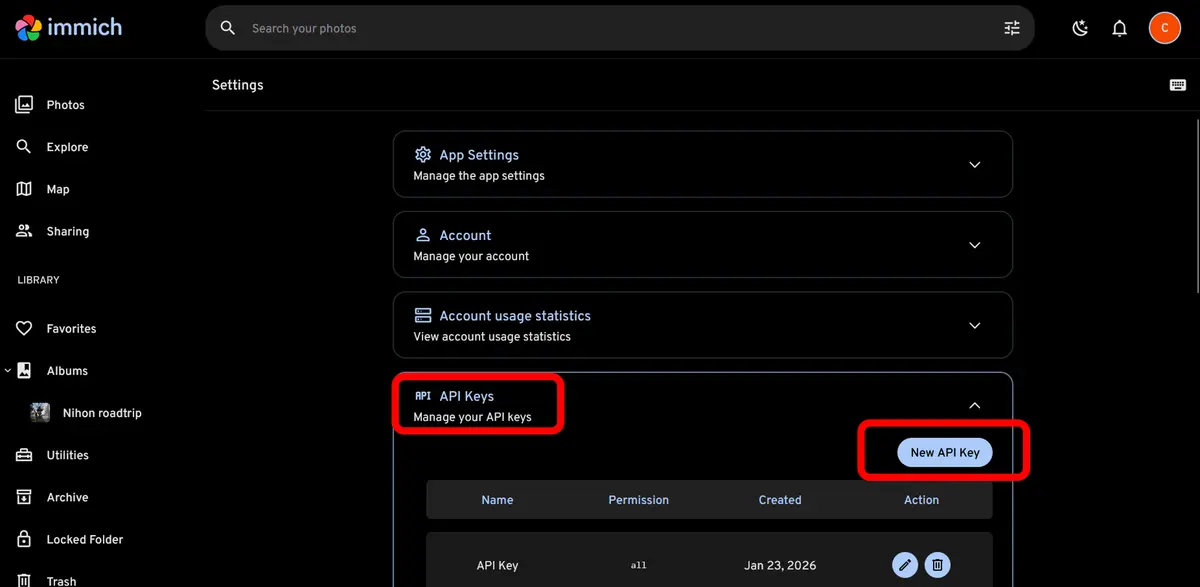
Copy and save this key. It will be used to authenticate the import command.
Step 5. Import the Photos into Immich
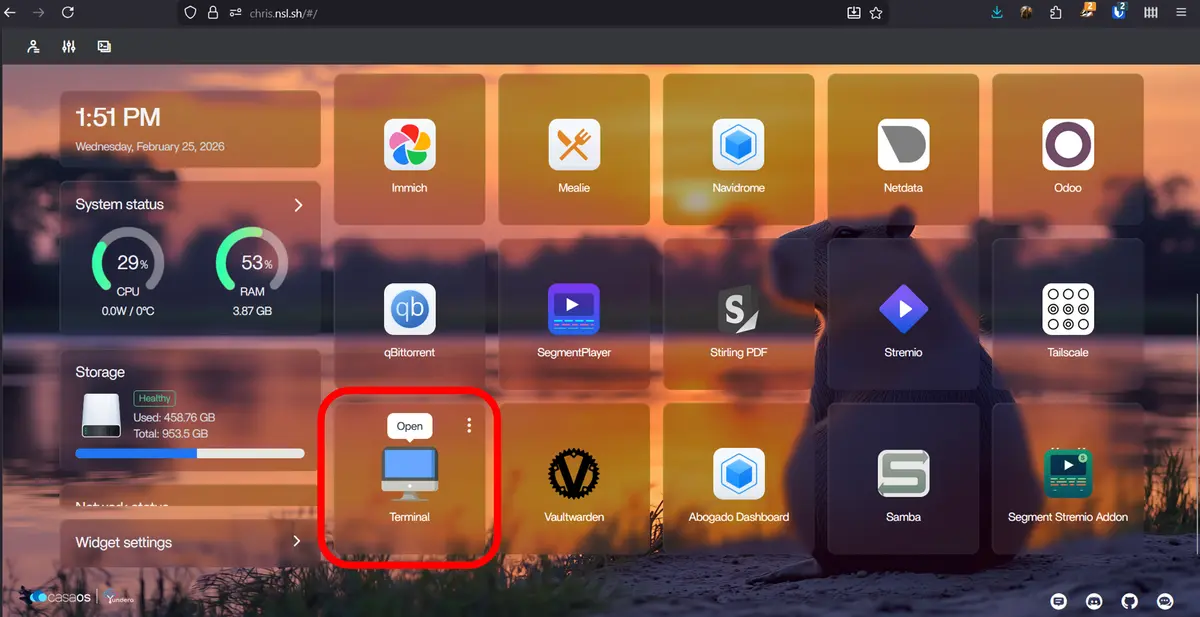
Now open the Terminal from your Yundera dashboard.
First authenticate the Immich CLI using your API key:
docker exec immich immich login-key http://localhost YOUR_API_KEY
Replace YOUR_API_KEY with the key you created earlier.
Then start the import process:
docker exec immich immich upload --recursive /import
Immich will scan the folder containing your uploaded files and begin importing them into your library.
As the process runs, the terminal will display how many files were detected and how many were successfully imported.
What Happens During the Import
Immich processes each file locally inside the server. It reads metadata, generates thumbnails, and adds the photos to your timeline.
If the same file already exists in your library, Immich detects it automatically using file hashes and skips duplicates.
This makes the migration safe even if you accidentally upload the same folder twice.
Why This Method Works Better for Large Libraries
Uploading photos through a web interface relies on HTTP requests. In Immich, files larger than about 100 MB may fail during this process.
By uploading files directly to the server and using the Immich CLI inside the Docker container, the transfer happens locally. The files never travel through the web upload pipeline, so the size limitation disappears.
This is why the command
docker exec immich immich upload --recursive /import
is the most reliable method for importing a full Google Photos archive.
After the Migration
Once the import finishes, your entire library will appear inside Immich. Your photos are now indexed, searchable, and organized in the timeline.
From that point forward, you can continue using the Immich mobile app to automatically back up new photos from your phone.
Your memories are no longer locked inside a platform. They are stored on your own server.
How to Migrate from Google Photos to Immich